layout xml 파일에서 배경과 배경 패딩, 그리고 리스트를 주기 위해서 커스텀 attibute를 설정하였다.
1. res/values/attrs.xml
<resources>
    <declare-styleable name="RouletteView">
        <attr name="rouletteBackground" format="reference"></attr>
        <attr name="roulettePadding" format="dimension"></attr>
        <attr name="listItem" format="reference"></attr>
    </declare-styleable>
</resources>
rouletteBackground - 룰렛 배경으로 넣는 이미지
reference 포맷으로 하면 "@drawable/XXX" 이런식으로 입력해야 한다.
roulettePadding - 룰렛 배경에서 얼마만큼 패딩을 줄지
Xdp로 받기 위해 dimension 포맷으로 설정하였다.
listItem - 룰렛 아이템을 array resource로 관리할 수 있게 설정하였다.
2. RouletteView.kt
constructor(context: Context, attrs: AttributeSet?) : super(context, attrs) {
    initialize(context, attrs!!)
}

constructor(context: Context?, attrs: AttributeSet?, defStyleAttr: Int) : super(
    context,
    attrs,
    defStyleAttr
) {
    initialize(context!!, attrs!!)
}

@RequiresApi(Build.VERSION_CODES.LOLLIPOP)
constructor(
    context: Context?,
    attrs: AttributeSet?,
    defStyleAttr: Int,
    defStyleRes: Int
) : super(context, attrs, defStyleAttr, defStyleRes) {
    initialize(context!!, attrs!!)
}


private fun initialize(context: Context, attrs: AttributeSet) {
        var attrList: TypedArray = context.obtainStyledAttributes(attrs, R.styleable.RouletteView)
        var mBackground = attrList.getDrawable(R.styleable.RouletteView_rouletteBackground)
        background = mBackground
        backgroundPadding = attrList.getDimensionPixelSize(R.styleable.RouletteView_roulettePadding, 0)
        stringArr = attrList.getTextArray(R.styleable.RouletteView_listItem)
        attrList.recycle()

        arcPaintArr = Array(stringArr.size) { Paint()}
        textPaintArr = Array(stringArr.size) { Paint()}
        for (i in stringArr.indices) {
            var index:Int = (random()*_colorArr.size).toInt()
            arcPaintArr[i].color = _colorArr[index].toInt()
            textPaintArr[i].apply {
                color = Color.RED
                textSize = 24f
                textAlign = Paint.Align.CENTER
            }
        }
    }
attr로 넘어온 속성들을 처리해주도록 하였고
원래 init 스코프? 에서 처리하던 Paint 객체 생성 작업의 위치를 옮겼다.
색상은 우선 리스트에서 랜덤으로 선택해서 나오도록 하였음..
3. activity_main.xml
이런식으로 설정해주면..
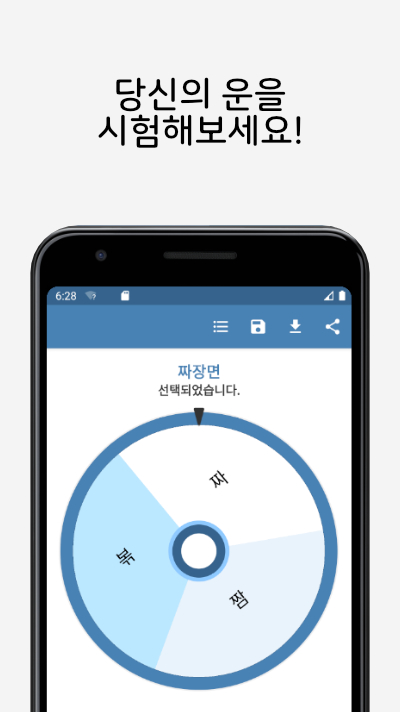
이런식으로 나오게 된다 ㅎㅎ
슬슬 그럴듯한 모습이 나오기 시작했다.
다음은 사용자한테서 리스트를 입력받는 팝업과
입력받아서 룰렛 세팅하는 것까지 해야지 :)